I now have 49 solar panels on my house. In the summer I routinely produce an excess of 10 kW of solar energy. I plan to purchase a 14 kWh Tesla Powerwall for the system, but it has been surprisingly complicated to accomplish. Before the NEM 3 cutoff date, people were rushing to install solar power since California will reduce the payment for solar power sold to the grid. Does it surprise anyone else that California of all places will discourage people from installing solar power on their homes? I am fortunate to already have solar, so I will continue to receive the same amount for what I sell, which by the way already isn’t much. I need to wait and see if PG&E tries to kick me out of NEM 2 for installing a battery after the NEM 3 cut off date.
I installed my own solar battery system for about $1200. It includes nine 35 Ah sealed cells from Harbor Freight, which cost $75 each, two 18 Ah cells that I had sitting around, a Harbor Freight 2000W inverter, which cost $170, and an Arduino Uno. Another expense is the heavy gauge wire used to connect all the batteries. Each pair was about $12, so it adds up to more than $120. The battery charger cost $189.
I used a Real Time Clock with the Arduino to close a relay for 50 minute intervals starting every morning at 3 AM. This continues until 8 AM. The inverter switches off around 11.5 Volts DC input. The output voltage reduces to around 100 VAC, which is how it decides to cut off. The batteries recover so that if the inverter is turned back on, it releases more energy. By the last try it only runs for a few minutes.
The battery charger will supply up to 250 A to start a car. I use the 50 Amp setting. Fully charged, the battery pack sits at about 13.5 Volts. I need to fully recharge while I have solar power. At 50 Amps, the charger supplies 600 Watts. In the summer I make solar power from about 9 AM to about 4 PM, so that’s seven hours. The charger is plugged in to an Emporia Smart Plug which communicates with a central unit that monitors the power meter. The Smart Plug knows when I am making excess solar power so that all my battery charging is free. I also added timer in series because the smart plug was not always turning off in the evening.
I used a “Kill-A-Watt” to measure energy (kWh) produced by the battery pack in the morning. It produces about 3.2 kWh. I then used the same meter to read how much energy I used to charge. That was 5.94 kWh. The batteries are rated at 35 Ah, so at 12 Volts that’s 350 x 12 = 4.2 kWh. That sits between charge and discharge. The efficiency of the system is 54%. That’s kind of disappointing, but my charging is free, so I don’t care too much. It tells me that if I wanted 10 kWh of storage that I would need about 22 more batteries, two more chargers and two more inverters, or better yet a much bigger inverter. That cost would be $75 x 22 + $189 x 2 + $170 x 2 = $2368. My total cost would be $3568. The Emporia 10 kWh solar battery installed costs $18,000. That would be tied in to my whole house and automatically switch in and out. The Lithium Ion battery probably also has efficiency much better than 54%. It’s good to see the difference between the professional price and DIY price.
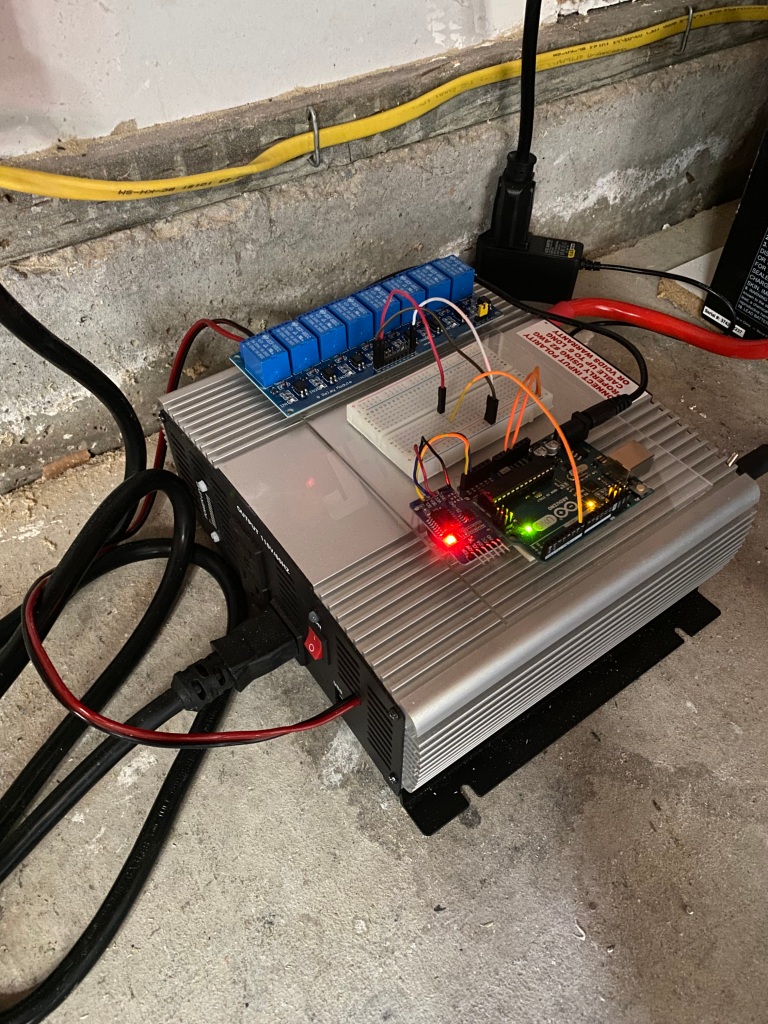
Here is the 2000 W inverter with externally wired activation switch attached to a relay controlled by an Arduino Uno with a Real Time Clock. I simply put a wire pair in series with the inverter on/off switch.

Here is a close up of the Arduino, RTC, and Relay bank. I am only using one relay, but I had this bank so I used it. If I expanded the battery pack, I could switch more inverters using more relays.

Here is the battery charger and stack of batteries.

Here is a view of the entire system. It sits in the garage so that I don’t hear the inverter fan operate early in the morning.

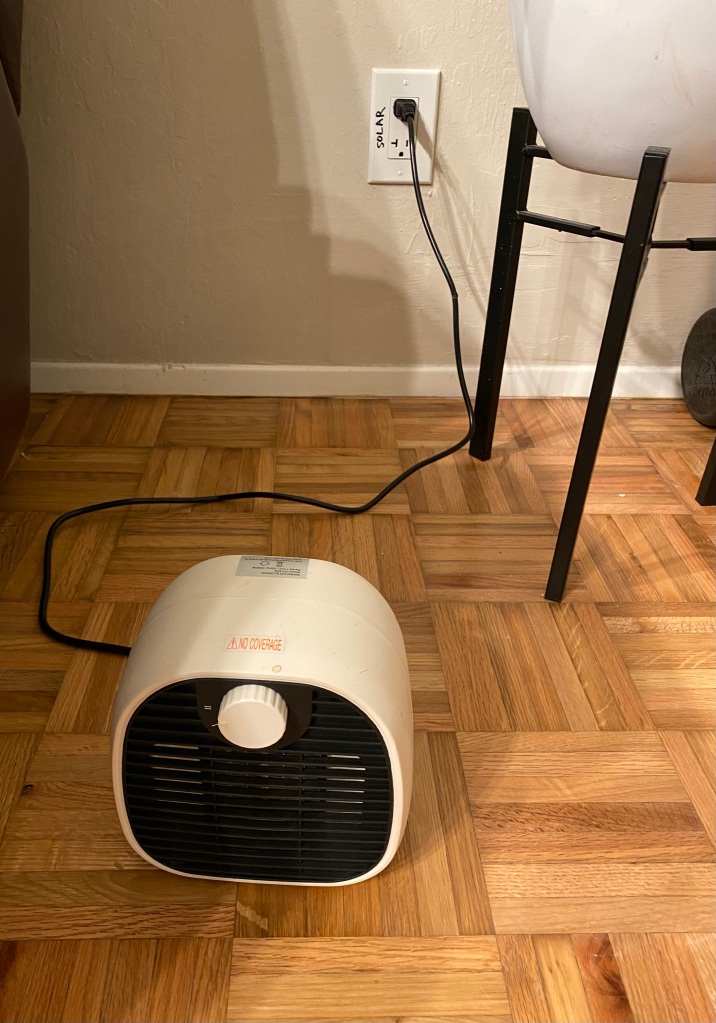
I had a special wire run from the garage to the living room so that I could run this 1 kW heater. This circuit is not part of the house wiring.

I run this system every day now. It warms up my living room a bit before I exercise.
Here is the Arduino code that runs the relay
Real Time Clock HiLetgo DS3231 I2C Relay Switch.ino
#include <RTClib.h>
#include <Wire.h>
RTC_DS3231 rtc;
char t[32];
int relayPin = 7;
void setup()
{
pinMode(relayPin, OUTPUT); // Set relay pin to output mode
digitalWrite(relayPin, HIGH); // This light is off when the pin is high
Serial.begin(9600);
Wire.begin();
rtc.begin();
// Uncomment the next line to update time and date from the PC
// Don’t uncomment this unless the board is conencted to USB
//rtc.adjust(DateTime(F(DATE),F(TIME)));
// If you want to, you can set a particular time and date
//rtc.adjust(DateTime(2019, 1, 21, 5, 0, 0));
}
void loop()
{
DateTime now = rtc.now();
sprintf(t, “%02d:%02d:%02d %02d/%02d/%02d”, now.hour(), now.minute(), now.second(), now.day(), now.month(), now.year());
Serial.print(F(“Date/Time: “));
Serial.println(t);
delay(1000);
int hour = now.hour();
int minute = now.minute();
// Turn on for 50 minutes at 3, 4, 5, 6, 7, and 8 AM
// The battery should drive a 1 kW heater for less than
// four hours. The batteries recover after the inverter shuts
// down, so repeated turn on draws more power.
// Full charge is 14.4 Volts
// Inverter turn off is around 11.5 Volts
// I have 351 Ah, so approximately 4.2 kWh of stored energy
// at 12V. Real energy delivered is a lot less than that, but
// the turn on time should assure that all avaialable
// battery energy is used.
if ((hour > 2) && (hour < 9) && (minute > 0) && (minute < 50)) {digitalWrite(relayPin, LOW);} else {digitalWrite(relayPin, HIGH);}
}
UPDATE: Something went wrong
I smelled an unidentified chemical odor in my garage. I finally figured out that it came from exploding batteries. Three cells have expanded and expelled material. I removed them and kept running. Why these three particular cells failed I can’t be sure. I will keep an eye on the rest. I think it could come from the fact that my battery charger in 50 Amp charging mode might overvoltage the batteries at the end of the day.
It will be interesting to see if the rest of the batteries keep operating without this problem. If they do, there must be manufacturing differences. Three out of nine didn’t make it.


Update 8 December 2023
Two more batteries failed in the same way. I re-measured efficiency yesterday and today. With my remaining batteries, using the KILL A WATT EZ I measured charging energy 1.64 kWh. This morning I measured discharge energy 0.83 kWh. Efficiency is 50.61%. I looked up component efficiencies. The Harbor Freight inverter claims 87% efficiency. I read that lead acid batteries have a 70% Watt hour efficiency. The battery charger should have efficiency in the range 83 to 94%.
70% * 87% * 83% = 50.55%
Sound familiar?
My new Tesla Powerwall claims to have 90% efficiency. It makes more sense for me to devote my 1.64 kWh in the day time to charge my Powerwall a bit more and go ahead and use wall plug power in the morning for my heaters.
I unplugged battery charging on 8 December 2023. My do it yourself solar battery project has concluded.